In my prior post, I discussed how to get the best price for the development of your app by creating a solid specification / RFP. Once you have created a great spec and chosen a vendor to do the work, you can just sit back and wait until the development is completed, right? Nope! Now is the time to start pre-release tasks– tasks related to marketing, localization, and finding tools to help you once your app goes live.
The task ahead of you is never stronger than the strength inside of you! ~ 1 Happy Thought
Gain Public Visibility
By the time your app is fully tested, it would be great to have a public presence so that people can find you — it will help you from a marketing perspective and will start to build trust and consumer confidence in your capabilities and your app.
Using Facebook, Twitter and LinkedIn
One way to establish your public persona is to create Twitter, LinkedIn and Facebook accounts for your business so that others can find you and so that you can begin communicating with people who share an interest in your product offerings. Twitter, LinkedIn and Facebook are free and setting them up just takes a few minutes.
Once these accounts are setup for your business, you should start building a following. First, invite all of your friends to follow you but that is not going to give you a wide audience. To build a broader audience, begin following other people who share common interests and ask them to follow you back. You can do this manually but it is quite tedious. I use a neat little tool called JustUnfollow (http://www.JustUnfollow.com). It allows you to find others to follow based on keywords or even by having it see who is following someone else you might know. You can use the tool to follow others and see who is following you back. In most cases, I unfollow people who have not reciprocated the following because I want it to be a win-win relationship.
Creating a Twitter and Facebook account without posting any Tweets or Facebook posts is a waste of time. Once you begin building your following, try to Tweet, and do a Facebook and LinkedIn post a few times a week. Tweet about things that are cool and complimentary to your app. Tweet about the progress of your app development. As you are reading this post, it was posted to my Twitter and Facebook account so that it can be distributed to my followers. With this, I am providing helpful information to other appreneurs and appreneur wannabes — so hopefully I am providing good articles that people are interested in.
You can see my Twitter account at https://twitter.com/2HourAppreneur and my Facebook account at http://www.facebook.com/2hourappreneur.
Build your Website
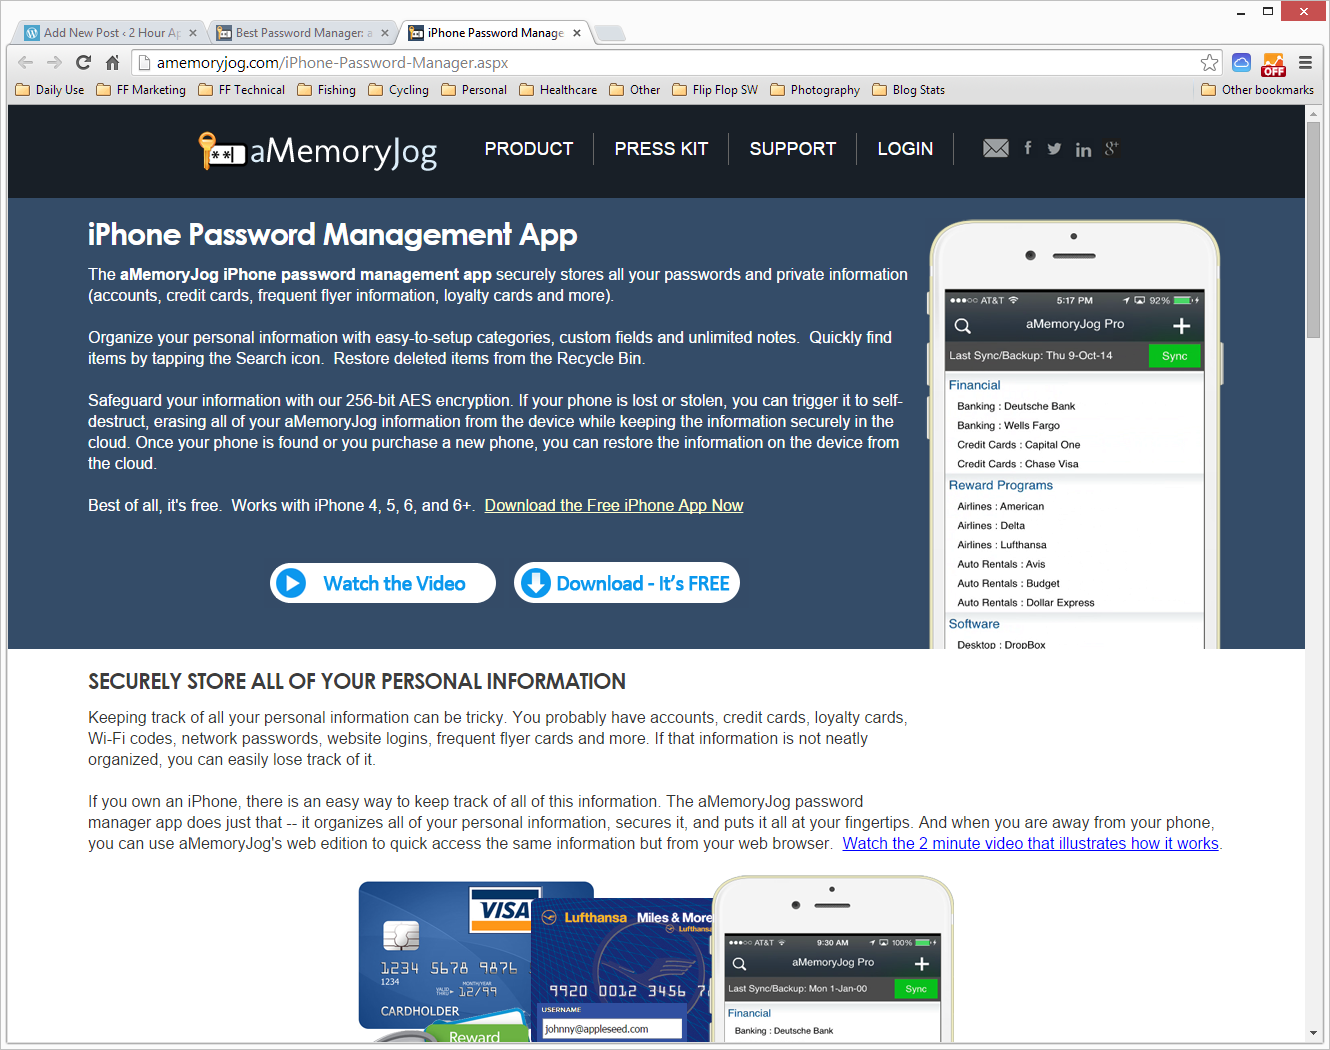
You will need to build a website that showcases your app. You can subcontract this work out to someone on oDesk (http://www.oDesk.com) or if you are technically inclined, I would suggest purchasing a website template and customizing it for your own needs. You can purchase a website template from lots of different sites but I really like Template Monster (http://www.TemplateMonster.com).
I did this with my website (http://www.aMemoryJog.com and http://www.amemoryjog.com/iPhone.aspx). My template set me back about $45 and I customized it with my own content, screen shots and descriptions.
If you decide to customize your own website, you should also learn a bit about Search Engine Optimization (SEO). SEO is a way of creating your web pages in a way that makes it easy for Google, Bing and other search engines to find it based on specific keywords you are targeting. There are lots of articles on SEO, just Google it and you will get an idea of the tactics needed to give your site the best chance of ranking higher by the search engines. You can also subcontract this task out to someone on oDesk, but I think it is a good idea to learn what this is about and take the first stab at it. You can always enlist a professional later once your product starts generating cash flow.
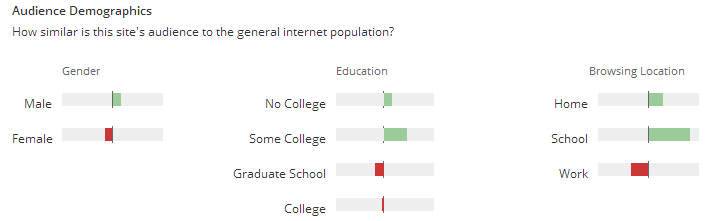
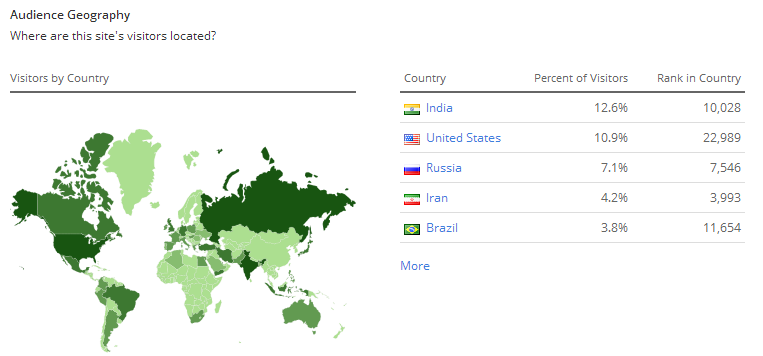
While we are discussing websites, make sure that you hook up Google Analytics to your website so that you can see how many visitors you get, what pages they visit most often, what country they come from, what browsers or mobile devices they using to access your website, etc. Google Analytics is also free and easy to hook up into your website, you can learn more here: https://www.google.com/analytics. Not only will you use Google Analytics to analyze your web traffic, you can also hook it up for your app to get the same type of statistics for people using your app!
Related article: How to Build a Product Website for your App
Develop your App Descriptions and Keywords
Once your web persona is created, it is now time to shift focus back to your app. When you’re looking for new apps in the Apple or Google App Stores, you probably do a search for them, right? The other day I was looking a for an app that would allow me to track a list of meals I normally eat because at the end of the day, I am always trying to answer the question “What should I eat tonight?”. I thought it would be cool to put my favorite dishes in a tool and be able to see them by breakfast, lunch and dinner. It would also be cool to let me randomly pick one of my favorite foods to cook.
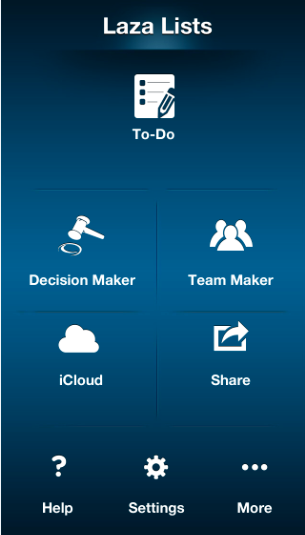
To find the app, I searched the App Store for “Whats for Dinner Tonight”. It came up with lots of apps but most of them tracked calories, had tons of recipes, etc. Overkill for what I was looking for. So I started to think that I could really just use a To Do List type app to list my favorite foods. But I also wanted to have the ability to randomly pick an item so I searched for “To Do List Randomizer”. It returned several apps and I was drawn to a particular app called “Laza Lists” (https://www.youtube.com/watch?v=ytzZtiBrRSY).
So why did I choose them over all of the other apps? Well first, I noticed their app icon and really liked it:

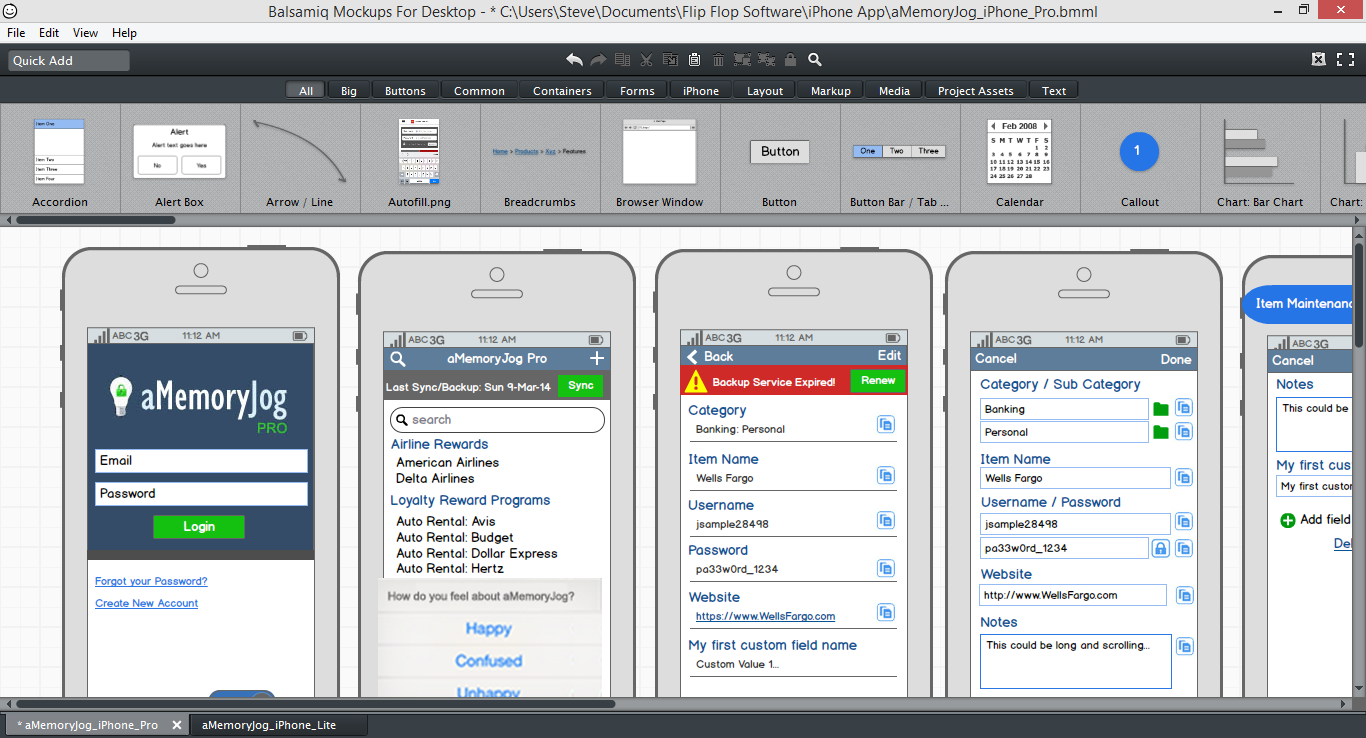
Then I read their description it talked about having a randomizer feature — that really pulled me in because I wanted that ability. Then I looked at their screen shots and it looked to have a clean and simple user interface.
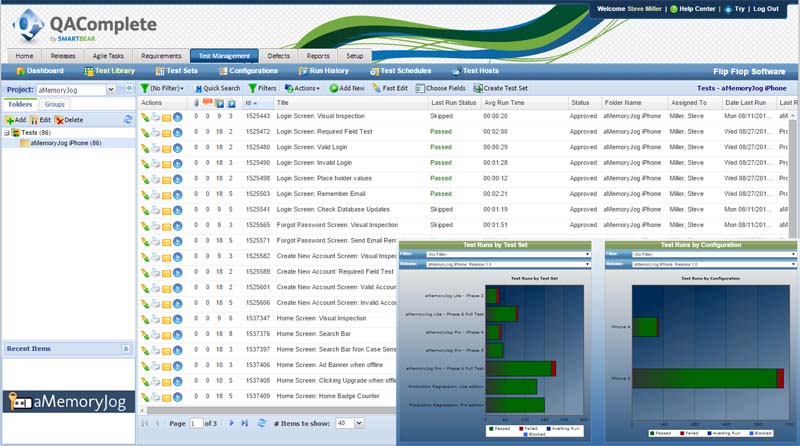
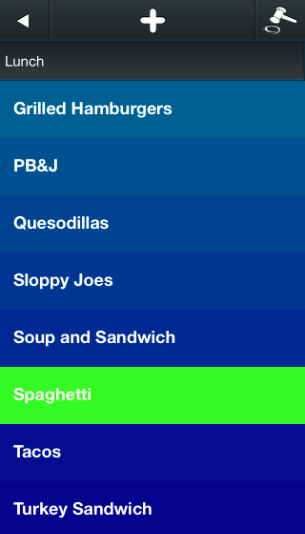
So based on this, I downloaded it and setup my meals in the “Decision Maker” section so that I could randomly choose something eat each day (below is a list of Lunch items and the green one is the one I selected randomly by tapping the gavel in the top right of the screen):
So as you can see, there 4 things that affected my decision about choosing their app over others:
- The keywords that I entered (To Do List Randomizer) showed me their app
- The app icon caught my eye
- The app description convinced me that it was the right app
- The screen shots showed me that the app would be clean and easy-to-use.
So this brings us back to your app. You need to spend a lot of time thinking about how you describe your app in the App Description section of the App Store. It will show the first 4 lines of your description before you click “More” so your value proposition must be clear in the first 4 lines. You should get a professional graphic artist (from oDesk) to create a cool looking app icon because that will catch your eye first. You should have the app designed with a clean look. And finally, you should think of keywords that people might search for to find your app. When setting up your app in the App Store, you can enter 100 characters of keywords, each one separated by a comma — so it is important that you choose ones that people will most likely search on.
So how do you know if your description and keywords are correct? You can start by researching your competitors to see what keywords and descriptions they use. The App Store will show you the description but it will not show you their keywords. But you can use a number of different tools to find that out (AppCodes: http://www.appcodes.com/, Sensor Tower: http://SensorTower.com, and Strapley: http://Straply.com) are the ones I use. Once you research 5 or 6 competitors, you will start to see a pattern and can make your own judgments.
Once you have figured these things out, put your App Title, App Description and Keywords into an MS Word (or similar) document so that it will be handy when you get ready to submit your app to the App Store.
Develop a list of contacts for reviewers, bloggers, and journalists
As soon as your app is completed and submitted to the App Store, you will want to generate some buzz for your app. One way to start buzz is to have reviewers try your app and write a review about it. Likewise, you can contact bloggers, technical writers, and other journalists that might agree to give you feedback on your app and if you are lucky they may include your app in their blogs, electronic articles or their magazine articles.
So now is the perfect time to start looking for bloggers, app review sites, and magazine editors whose audience might be interested in your app. Spend time each day looking for these people and sites and log them into a Customer Relationship Manager (CRM) so that once your app is published, their contact information will be handy. What CRM should you use? There are a number of free CRM systems, I settled on Zoho CRM (https://www.zoho.com/crm) because it was free, easy to use and could send emails out.
Once your app is completed, you will want to contact these people so you will also need to create a Press Release and a Press Kit. This provides them with all they need to know to try your product and to provide a review of it. If you want to see my Press Kit (which also contains a Press Release), you can see it here: http://amemoryjog.com/PressKit.html.
You will also want to post a video of your app in action on YouTube. You can create the video using Camtasia or Jing (http://www.jingproject.com) and post it directly to YouTube. That will also be part of your Press Kit.
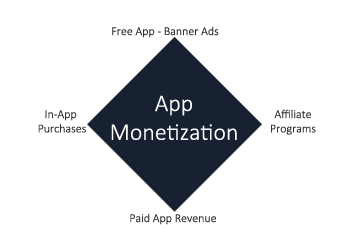
Sign up for Banner Ad Networks
If your app is free, you will probably want to include banner advertising to drive some revenue your way. Before your app is fully developed is the time to sign up for banner ad networks. I use iAd (http://advertising.apple.com/) and adMob (http://www.google.com/ads/admob/). While you are at it, sign up for Apple’s Affiliate Network (https://www.apple.com/itunes/affiliates/), you will cross promote other people’s app within yours (by adding a MORE section) and each time they purchase an app, you will get an affiliate commission.
Localization
Once done, your app will be in the App Store and will seen all over the world. Imagine you live in Spain and search the App Store for an app similar to yours. Let’s say it shows 10 apps and 2 of them have descriptions and screen shots that are in Spanish instead of English. I would guess that the Spaniard will look more closely at the ones in his own language than the English ones. That’s why it is a great idea to localize your app for different countries. You don’t have to do all countries, but consider supporting the more popular languages (English, Spanish, Italian, French, German, Japanese, Chinese and Russian).
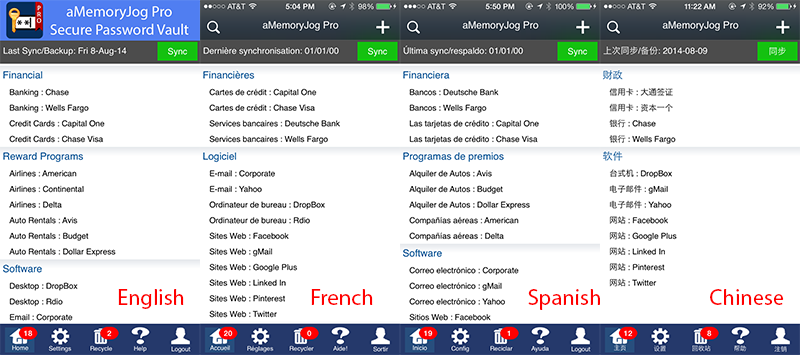
It does take more thought and preparation to localize an app because your app has to display things in the supported language, screen shots will have to be taken in those languages and your App Store descriptions and keywords will work best if localized. Use the pre-production time to hire subcontractors from oDesk to provide localized text. I did this and the cost was not overly stiff. It cost me on average about $30 per language to localize our text — which included screen elements (labels, buttons, etc.) and App Store Descriptions and keywords.
Here is an example of how aMemoryJog looks localized in a few languages:
Putting it all Together
Here are the tasks you should be doing as your app is being developed:
- Setup Facebook, Twitter and LinkedIn accounts, start posting to those weekly
- Build your website using a template and build with SEO in mind
- Develop your app icon, app descriptions, app title and keywords
- Develop a list of 100 or more contacts for bloggers, technical writers, and/or magazine editors, keep this information in a CRM system
- Create a press release, press kit and YouTube movies for your app
- Sign up for banner ad networks and the Apple Affiliate program
- Localize all your screen text, app descriptions, keywords and take localized screen shots
Conclusion
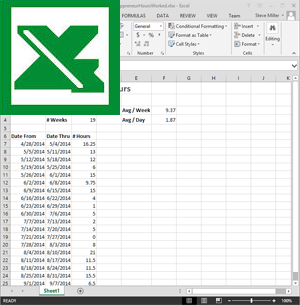
Now we what things we should be doing as our app is under development. My next blog will be out in a couple of weeks — I will discuss hot to keep track of your appreneur tasks and time spent each day on tasks.
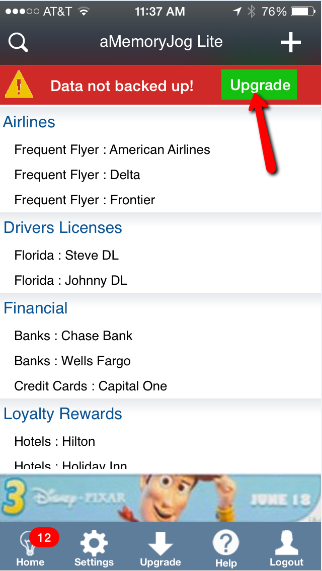
Shameless Plug
The app I am creating is almost done, we plan to submit it to the Apple App Store this week. It should take about a week to get approved by Apple, so the app will be available VERY SOON! If you haven’t already, download the web edition at http://www.aMemoryJog.com. Once the app is done, it will seamlessly sync with the web version.
Download a free trial and check it out!
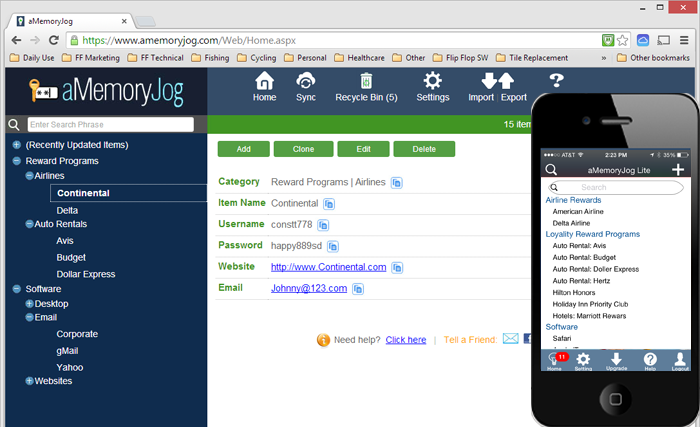
aMemoryJog – Web and iPhone editions
Also, if you like this blog, please share it with others to increase our following. Our twitter account is @2HourAppreneur and be sure to like my Facebook page at http://www.Facebook.com/2HourAppreneur.
Thanks for following the blog!

 I’ve had a few great mentors in my past and hopefully I have a few people that would consider me as their mentor.