Tag Archives: costs associated with app development

Outsourcing your App Development: Getting the Best Price

In my prior post, I discussed how to create a business plan for developing a mobile app. Once your business plan is complete and you have determined that your mobile app idea is viable, it is time to get bids from subcontractors for developing your app. But how do you get the best price possible?  Is cheapest always the best?  All of these questions will be answered in this blog.

The price of anything is the amount of life you exchange for it. — Henry David Thoreau

Getting Legal Protection

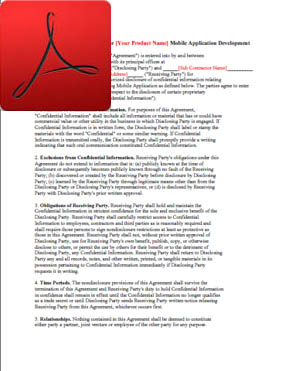
Before soliciting bids for outsourcing your mobile app development, be sure to have the right legal documents in place. Your idea is valuable, so you want to protect it. First, require bidders to first sign a Non Disclosure Agreement (NDA).  The NDA ensures that the bidder will not go off and develop your idea and sell it as their own. Here is an NDA you might consider using (click on an image to access the document):

NDA (MS Word)

NDA (MS Word)

NDA (PDF)

NDA (PDF)

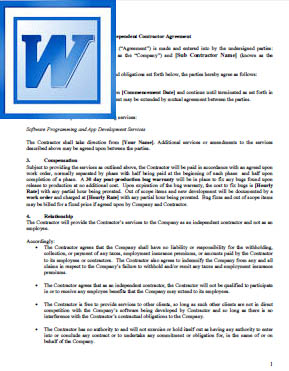
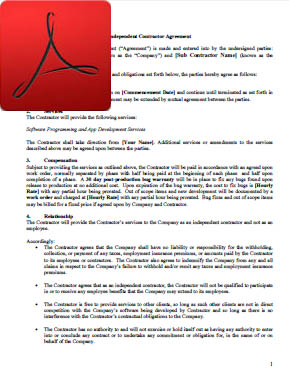
Once you choose a subcontractor, have them sign an Independent Contractor Agreement (ICA). This ensures that your intellectual property is protected and that they are acting solely as an independent contractor and not an employee.  Here is an ICA you might consider using (click on an image to access the document):

ICA (MS Word)

ICA (MS Word)

ICA (PDF)

ICA (PDF)

How to Get the Best Price from Your SubContractor

Imagine building a house without architectural plans. You might tell your builder “I want a small house with 3 bedrooms, 2 bathrooms, and a nice kitchen”.  That type of house might cost $100,000 or it could cost $1,000,000. It all depends on the finishes, the builder you choose, etc. A $100,000 house might have carpeting, no fireplace, laminate counters instead of granite, a single sink in your bathroom instead of dual sinks, and may be built as a rectangle, without any interesting exterior features.

A $1,000,000 home would most likely include hardwood floors, granite countertops in the kitchen and bathrooms, high-end appliances, indoor and outdoor fireplaces, incredible landscaping, a theater room, a home audio system that runs throughout the house, a pool and deck in the backyard, and a 2 story plan with a turret and other interesting design elements. To get a more accurate cost, you must be very specific in what you want so that few assumptions are made.

Software is very similar, you need a plan (called a Specification) that details what the app  might look like, all of the screens associated with the app, and what you expect the app to do on each screen. Without a specification, a developer cannot reliably provide you with an estimated cost because they cannot nail down exactly how much time it will take to complete it.

In fact, without a solid specification, few developers will provide you with a fixed price bid — they will want you to pay them by the hour — and this is not good for you because you are never sure of how much the app will cost to build. And they are correct — without a specification, you could change your mind a thousand times as you begin development which adds a lot of rework and unnecessary costs.

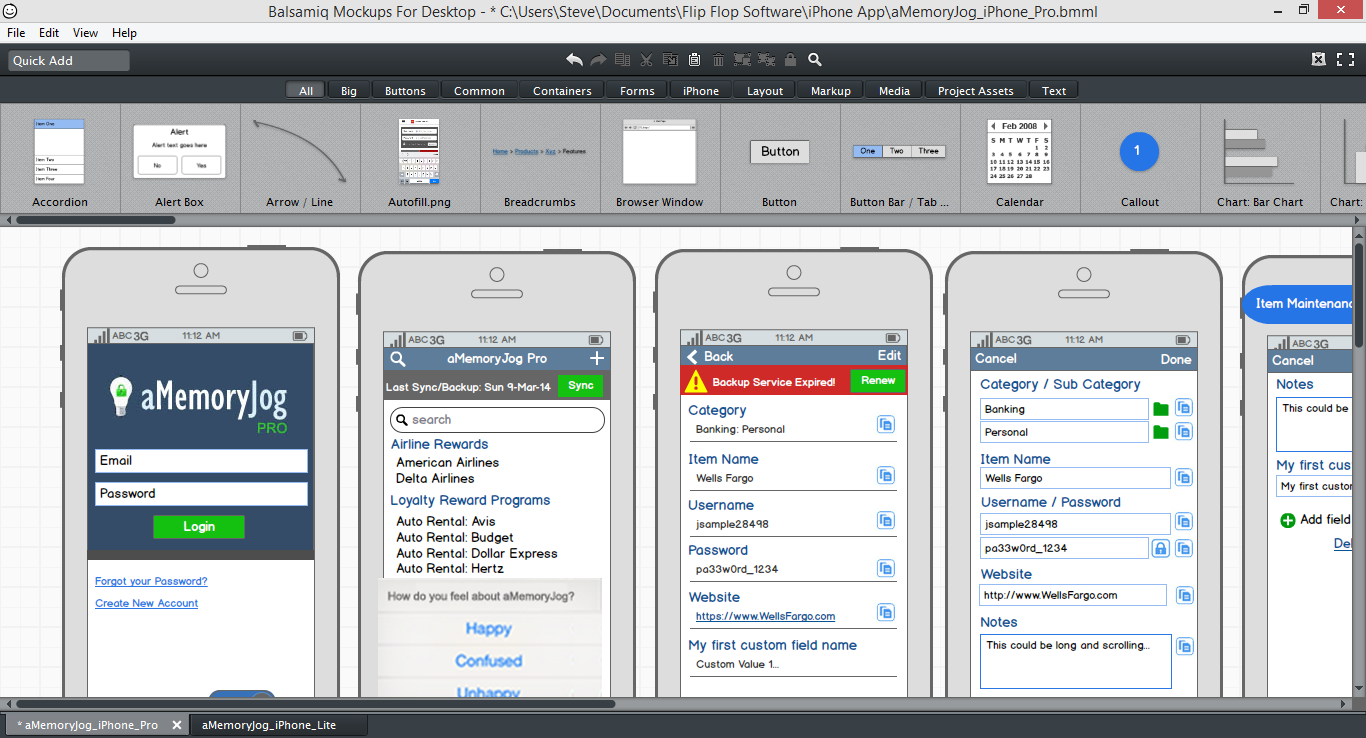
So how do you build a specification? First, create a prototype of your app. You don’t need programming skills to do this, simply purchase a prototyping tool (like  Balsamiq Mockups) and create your screens.  Here is how it might look in Balsamiq:

Balsamiq Mockup

Balsamiq Mockup

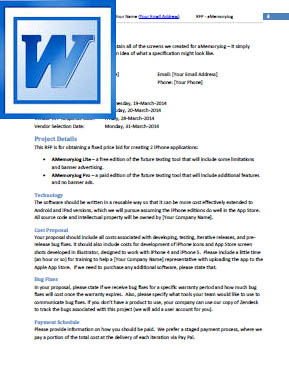
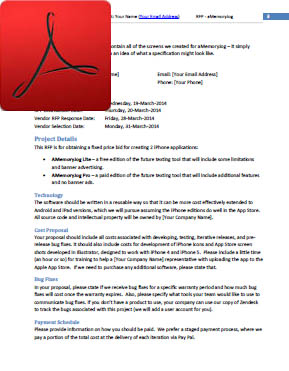
Once your prototype is created, write a specifications document that shows each screen and the details of how each  screen works. The specifications document will also serve as your Request For Proposal (RFP) document that you send to subcontractors to get bids for the work.  With a good specifications document, you can insist on a FIXED PRICE bid for the project so that you are not billed by the hour — this saves you from cost overruns. Here is a example of an RFP / Specifications document.  This document shows the first couple of screens developed for aMemoryJog to give you an idea of how to create a good RFP (click on the images below to access the document):

RFP (MS Word)

RFP (MS Word)

RFP (PDF)

RFP (PDF)

Selecting a SubContractor

You can find a subcontractor from oDesk (http://www.oDesk.com). oDesk is free to use but once you choose a subcontractor, they will charge you a 10% fee.

Once you create a free oDesk account, you can post your job with a budget amount. The budget amount is the amount you are willing to spend. You might find that some bids come under and others go over your budget, but the subcontractors use the proposed budget as a guideline to decide if they wish to bid on the work.  Here is how I posted my job for aMemoryJog:

We currently offer a web based application called aMemoryJog (http://www.aMemoryJog.com) and would like to subcontract the development of an iPhone edition using Xamarin, C#, SQL Lite and SQLCipher.

The work is for creating 2 iPhone apps, a free edition and a paid edition. We have created a very detailed specification complete with a database design, wireframes, and details of how each screen is to work.  

Part of the work is to also implement a web services component using Visual Studio 2012 (C#) that allows syncing data between the iPhone app and our web edition.

Knowing the complexity of what I was asking to have built, I put an initial budget amount of $5,000 (fixed price). Once I submitted that, I was able to search oDesk for qualified subcontractors and ask them to consider bidding.  I always try to hire a freelance programmer rather than an agency because an agency has overhead costs that a freelancer does not have, so a freelancer is normally less expensive.

Once I submitted my job posting, I began getting emails from subcontractors saying that they were interested. I would reply to them with the NDA document and ask them to sign it before sending them the detailed RFP.  Once I received their signed NDA, I sent them the RFP and asked for a fixed price bid.

After a few days, I began getting bids. Bids ranged from $4,000 to $17,000 — but most averaged $6,000.  I did not choose the cheapest subcontractor; I based my decision on how thorough the response was and how well they answered my questions. The subcontractor I chose provided me with a fixed price estimate, a detailed response on how he would develop the app, the milestone dates associated with the development, and provided me with examples of his past work and references I could contact to get comfortable with his work.

Putting it all Together

Here are the steps to getting the best price for your app development project:

  • Create a prototype of your app
  • Develop a specifications document for app
  • Put together an NDA document that must be signed before sending the RFP to the subcontractor
  • Submit your app job posting to oDesk but require that they sign the NDA before receiving the RFP and ask for a fixed price bid
  • Once bids come in, evaluate the bids based on thoroughness of the response, ask for milestone dates, samples of their work and references
  • Make s short list of bidders, review their work samples and contact their references
  • Choose a subcontractor but require that they sign an Independent Contractor Agreement (ICA) before starting work

Related article: How to Build a Product Website for your App

Conclusion

Now we know how to get the best price from a subcontractor for our app development project. My next blog will be out in a couple of weeks — I will discuss what marketing tasks you can be doing as your app is being developed by your subcontractor.

Shameless Plug

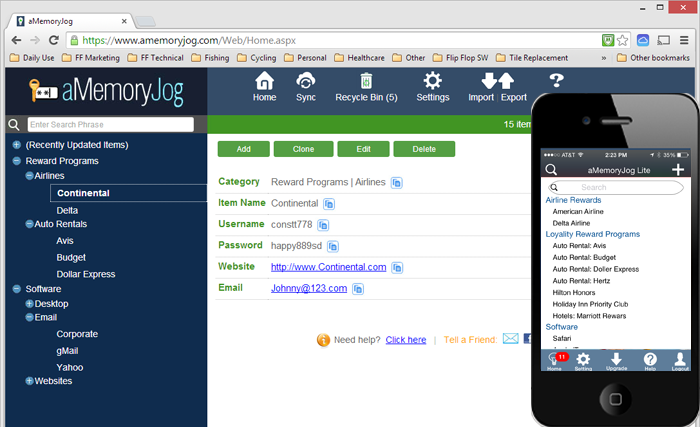
The app I am creating is slated for production in the App Store around July or August 2014. However, the web edition is already available at http://www.aMemoryJog.com. Once the app is done, it will seamlessly sync with the web version.

Download a free trial and check it out!

aMemoryJog – Web and iPhone editions

Also, if you like this blog, please share it with others to increase our following. Our twitter account is @2HourAppreneur and be sure to like my Facebook page at http://www.Facebook.com/2HourAppreneur.

Thanks for following the blog!

Putting the final touches on the Business Plan

In prior posts, I discussed many of the things to consider when developing a business plan for starting an #appreneur business.  It is now time to put the finishing touches on the business plan.

A man who does not plan long ahead will find trouble at his door. – Confucius

If you missed any of my prior posts, quickly access them from here:

Do Not Wear Rose Colored Glasses

Before committing money to any business, it is important to create a business plan. When doing this, don’t wear rose colored glasses. Too many people come up with an idea and convince themselves that it is a good idea without any objective analysis. If they do commit to doing a business plan, they skew their analysis to support their idea that the business is viable instead of objectively analyzing competitors, attainable market share, and overhead costs.  This is a great way to lose money.

How Can We Reduce Risks of Losing Money?

The best way to reduce the risks of losing money on a business venture is to go into the business planning with skepticism as to whether your business idea is worthy of investing in. Only after careful analysis of the market space, competitors and costs do you decide if the idea is worth investing in. If your analysis tells you that it is not financially viable — don’t waste your time and money! Go back to the drawing board and look for another idea that has reduced risks.

If your idea does look like it has legs (is viable), commit a certain amount of funds towards it, based on your startup analysis. Then when you commit those funds, keep an eye on your expenses. If your revenue is not what you expected or if your costs greatly exceed your projections, define a monetary threshold you will not exceed and if you do — shut it down! Pouring tons of money on a bad idea is a great way to go broke!

Anatomy of a Business Plan

OK, now that I’ve scared the hell out of you, you probably figured out that I am really just describing how important the business planning process is. Skip it and you will most likely fail. Go into with a biased optimism can also cause you to fail.

Go into it with open eyes and analyze everything you can so that you can make the best decision possible regarding the viability of your idea. In the past months, I’ve been feeding you blogs that described different parts of business planning.

Now it’s time to put all of this information into a document.  Here are the sections I normally include in a business plan:

  • General Company Description – This contains your mission statement, goals and objective, business philosophy, user demographic, industry information, company strength/weaknesses, and legal form of ownership.
  • Products and Services – Describes your product /services offered.
  • Marketing Plan – Describes your product features / benefits, customer profile, competitor revenue analysis, branding elements, the niche you are pursuing, marketing strategy, a description of the sales process and follow up, marketing budget, how you will price the product, a sales forecast for the first 2 years, and timelines.
  • Operational Plan – Describes your production and maintenance plan, business location, legal environment, personnel plans, inventory process, accounting procedures, general marketing approach, competitive matrix, startup and expenses and capitalization.

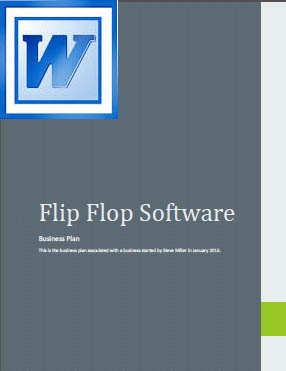
Rather than go into each of the above items in ad nauseum, I find it easier to simply give you an example of the business plan I built for aMemoryJog.  Of course, I hide our competitor list, as this proprietary, but you will understand the thinking that went into the analysis.  Below are 2 versions you can use, an MS Word and a PDF edition:

MS Word Version

MS Word Version

PDF Version

PDF Version

Related article: How to Build a Product Website for your App

Conclusion

Now we have a very good understanding of how to analyze our business idea and to create a business plan to determine if it is viable. My next blog will be out in a couple of weeks — I will discuss how develop a specifications document that you can hand off to a consultant to get the best price for developing your app.

Shameless Plug

The app I am creating is slated for production in the App Store around July or August 2014. However, the web edition is already available at http://www.aMemoryJog.com. Once the app is done, it will seamlessly sync with the web version.

Download a free trial and check it out!

aMemoryJog – Web and iPhone editions

Also, if you like this blog, please share it with others to increase our following. Our twitter account is @2HourAppreneur and be sure to like my Facebook page at http://www.Facebook.com/2HourAppreneur.

Thanks for following the blog!
Is your App Idea Financially Viable?

In our last post, we discussed how to define your competitive advantages as you begin your #appreneur journey. Once you have sized up your competition, it is now time to determine if your app idea is financially viable.

If you want to rear financial blessings, you have to sow financially. – Joel Osteen

How Much will it Cost to Develop My App?

The cost to develop an app will depend on the number of screens and complexity of the app, who you choose to develop the app, and how detailed your specification is before getting an estimate.  If you develop the app yourself, the costs will be smaller because there will be no subcontractor costs. However, I recommend you outsource the development so that you can spend your valuable time on pre-launch marketing and planning.

The first step in this process is to create a prototype of what your app might look like. There are some great prototyping tools available, I use Balsamiq Mockups. The cost of this software is minimal (one time fee of $79) and you can use it for all your upcoming apps if you are successful. Using Balsamiq, you can create each screen of your application, here is an example of the ones I put together:

Balsamiq Mockup

Balsamiq Mockup

By crafting your app ideas into a design, it forces you to flesh out the look and feel of each screen needed for a subcontractor to perform work.  Once you have the prototype done, create a specifications document that a subcontractor can create an estimate from.  In my specifications document, I like to include descriptive text that identifies what to do when any button is touched on the screen, what messages to display, etc.  By defining this level of detail, the subcontractor can provide a much better estimate because there are less unknowns.

In future blogs, I will discuss the specifications document in more detail (what to include and exclude), where to find subcontractors, what legal documents you should have in place when working with subcontractors, and how to pick a good subcontractor.

Assuming you have created a good prototype and specifications document, the cost of the development of your app will depend on the number of screens and complexity of your app. Based on my own experience, here are some very general guidelines, the prices are for a single platform (Apple iPhone, Apple iPad, Android device, etc.):

  • Small app (Less than 5 screens and little complexity) – $1,500 to $3,000
  • Medium app (Less than 10 screens and medium complexity) – $3,000 to $6,000.
  • Larger app (10+ screens and medium to harder complexity) – $6,000 to $15,000.

I also suggest that you ask the subcontractor to write the software in a way that allows them to re-use the code when targeting a different platform (Apple iPhone, Apple iPad, Android device, etc.). Also, ask the subcontractor for a ballpark estimate for creating a version in the other platforms once the first platform is done. By investing in a single platform first, it allows you to test the waters to determine if you want to sink additional money into the next platform. Once you recoup your costs on a specific platform, move on to another platform.

Other Costs to Consider

In addition to app development, here are some other costs to consider:

  • Registering your Business – You will need a business name and want to register it your state or province. The cost of setting up a LLC (Limited Liability Company) is about $125.
  • D-U-N-S number – It is also smart to get a Dunn and Bradstreet number for your business. This prevents you from having to use your social security number when working with vendors, you can use your D-U-N-S number instead. If you do this, allow 30 days to get it for free. If you want it expedited, it can cost as much as $299.
  • Website – You will want to create a website for your app that allows you to talk about the features of the app and allow them to purchase. By having a website, you will also get indexed by Google, driving more sales of your product. If you know HTML, I suggest writing your own website. Start off by purchasing a website template from somewhere like Template Monster, they are generally less than $50. You can then simply change the template with your site details. If you are not comfortable creating your own website, you can outsource this just as you do the app development. The cost of this will probably run you about $1,000 or less, especially if you ask them to use the template you purchased.
  • Website  Hosting – You will also want to purchase a domain for your app (for example, I purchased www.aMemoryJog.com) and you will need a company to host the site.  I purchased mine from Go Daddy, you should be able to purchase the domain and hosting for about $65 per year.
  • Google Ads – Once your website is up and running, you can purchase Google Ads to drive business to your site. This is totally optional but can increase your sales. You have to analyze the sales it brings to determine if it is worth it. In my past experience, it is, but every scenario is different. I normally budget $100 per month for Google Ads. Of course, do not do this until your app is in available for sale.
  • Apple App Developer (iTunes Connect) – To sell your app in the Apple App Store, you must sign up for iTunes Connect. This allows you to submit your app to Apple for review and once approved, they will post it in the app store. The cost for this is $99 per year. Apple will keep 30% of the sales from your app, and you will get 70%.
  • Google Play Developer – Similar to iTunes Connect, if you plan to create your app for Android devices, you will need a developer account for Google Play. The cost is $25 per year and like Apple, they keep 30% of your sales.
  • Email Marketing – If you plan to do any email marketing, you will need a product to send emails out automatically on your behalf. For example, when someone signs up for a trial of our web edition of aMemoryJog, it sends an email to the new subscriber welcoming them to the trial. Then every few days, it sends other emails explaining how the product works and how to purchase once their trial expires. This automated engine eliminates a lot of busy work of having to send these emails manually. Since I am a programmer by trade, I wrote the software to do this for my product. But you can purchase a tool to do this for your product. Tools like MailChimp are free to start with, allowing you to send up to 12,000 emails to 2,000 subscribers at no cost. After you exceed that, it could cost you from $40 to $100 a month, depending on the number of contacts you have and the number of emails you send.
  • Contact Management Tools – Once you begin marketing to app reviewers, you will want software to keep track of who you have communicated with and who needs to be sent an email about your app. You can get a contact manager for free until you collect a certain number of contacts. I use Zoho CRM, it is free for 5,000 contacts or less and only $20 per month once you exceed that.

Related article: How to Build a Product Website for your App

Estimating Your Revenue

This is the tricky part. About the best you can do is to try to determine the revenue of your competitors and then estimate yours based on a percentage of that. I discussed this in a prior blog. But I have to tell you from experience, it is a crap shoot.  You really won’t know your revenue until the product is in production. I always try to estimate very conservatively and hope to outpace my estimates. For example, you might look at the competitor with the least number of downloads and estimate that you can capture half that number of downloads.

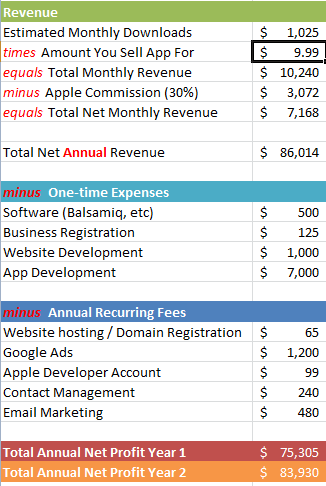
The best way to estimate your revenue is to estimate your monthly downloads multiplied by the cost of your app, minus the App Store commission of 30%.

Putting it all Together

Once you estimate your revenue for the year, subtract the costs, then you have your expected net profit. If you can live on that net profit, great!  If you can’t but it is at least half what you can live on, you can always create multiple apps to create a profit multiplier and still make the #appreneur life work.

Is your App Financially Viable?

Conclusion

We now have analyzed whether our app seems financially viable. If it looks promising, we should proceed. If not, we should go back to the drawing board – either think of another app idea or bail on app development in general. My next blog will be out in a couple of weeks — I will discuss how to monetize your app.

Shameless Plug

The app I am creating is slated for production in the App Store around July or August 2014. However, the web edition is already available at http://www.aMemoryJog.com. Once the app is done, it will seamlessly sync with the web version.

Download a free trial and check it out!

aMemoryJog – Web and iPhone editions

Also, if you like this blog, please share it with others to increase our following. Our twitter account is @2HourAppreneur and be sure to like my Facebook page at http://www.Facebook.com/2HourAppreneur.

Thanks for following the blog!